STEP 1.
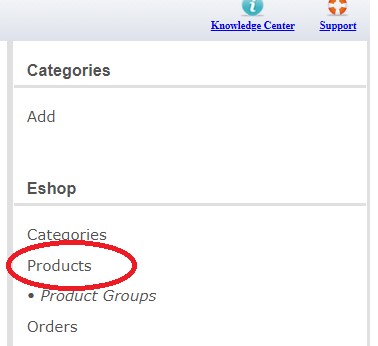
Click on E-shop
STEP 2.
Go to the Products Category
STEP 3.
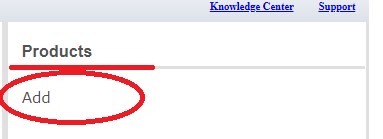
Add Products
STEP 4.
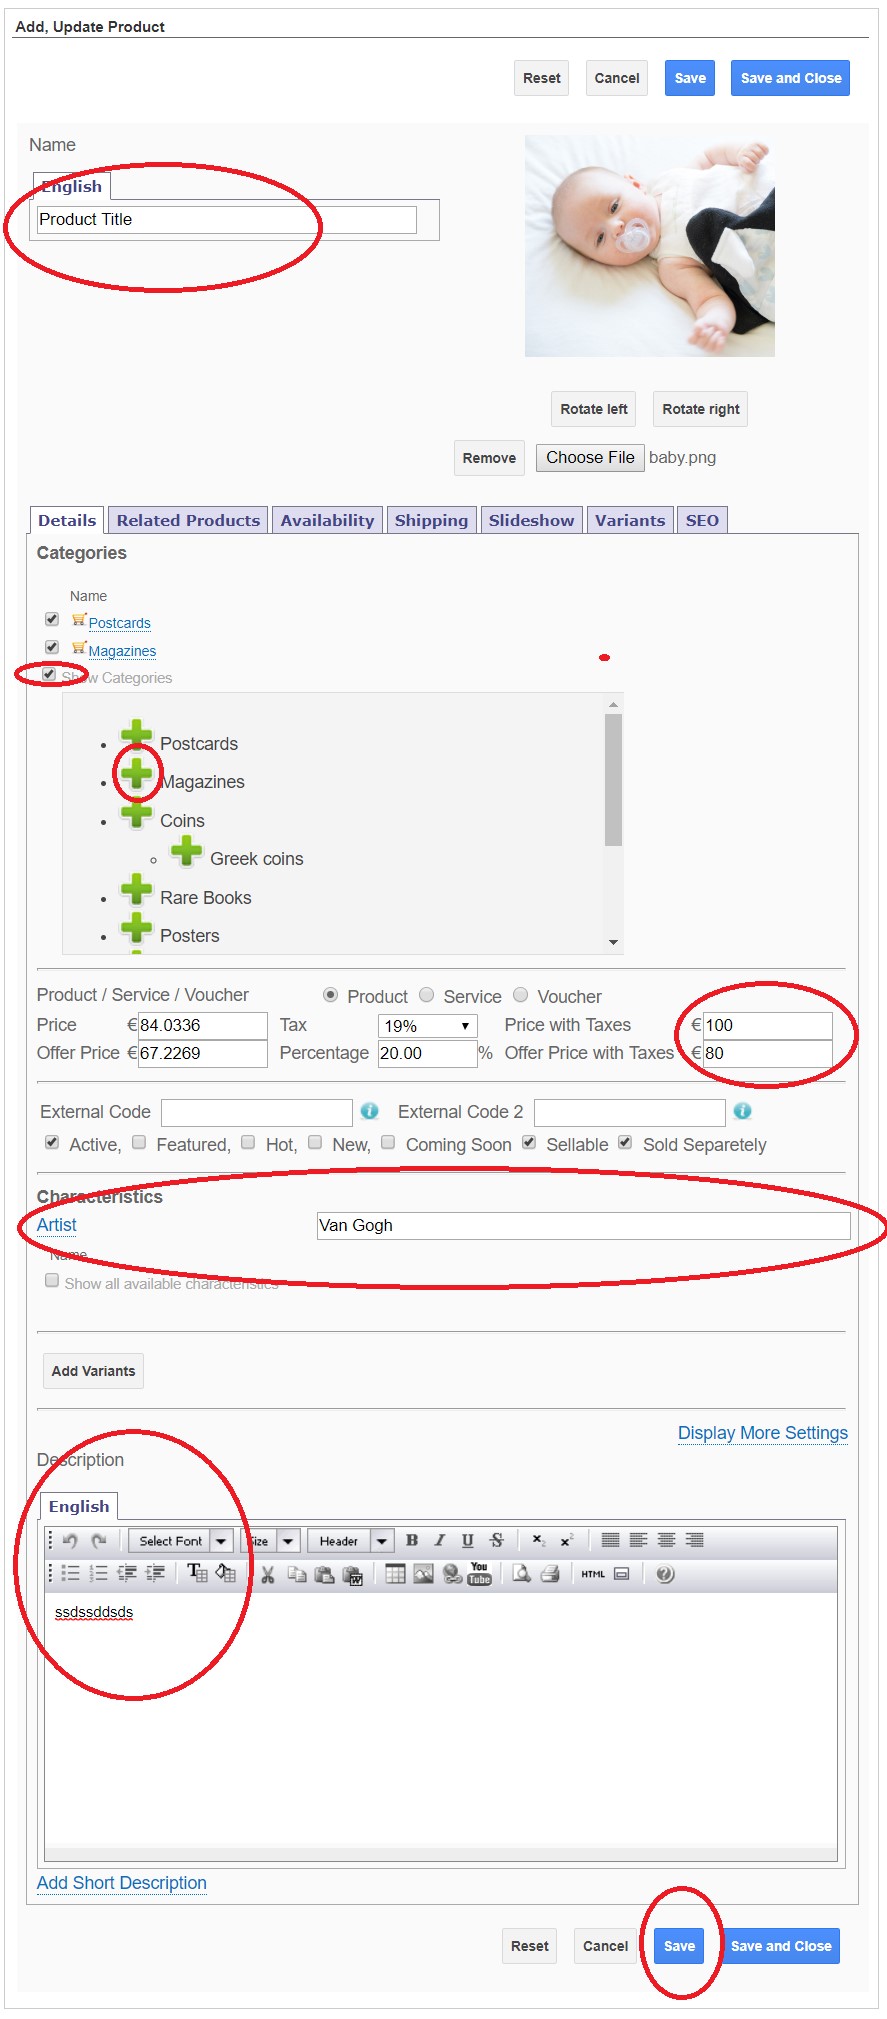
- Add product
- Choose file to add Photo ( Size must be under 2MB)
- Show Categories to add the Category of the product and then press the green cross to add the category to the product
- Enter a Sales Price or a Discount Price (If any)
- Enter additional product characteristics (Brand) (If needed)
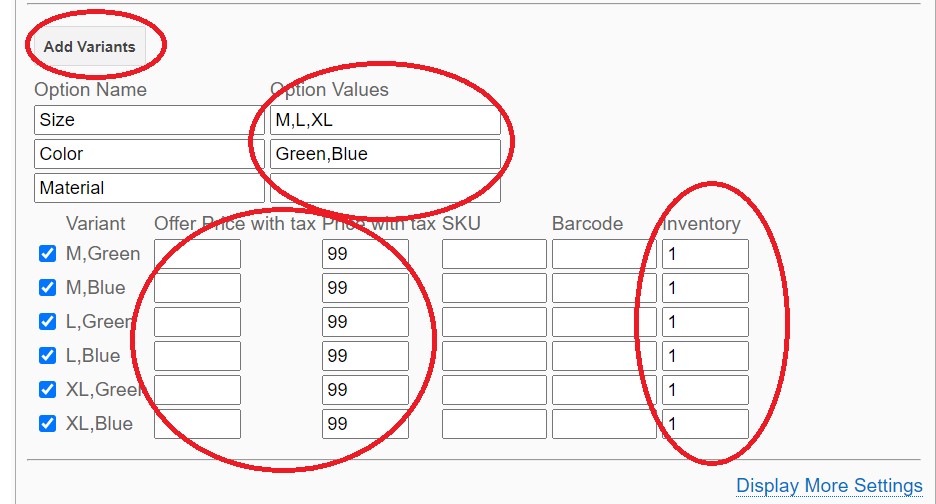
- Press the Add Variants button (to add Size, Color, etc.)
- The Option Name can be changed if needed
- In the table that is being created you can add:
- the Price with VAT
- Offer Price with VAT
- Product Code
- Stock Quantity
STEP 5.
Press SAVE
STEP 6.
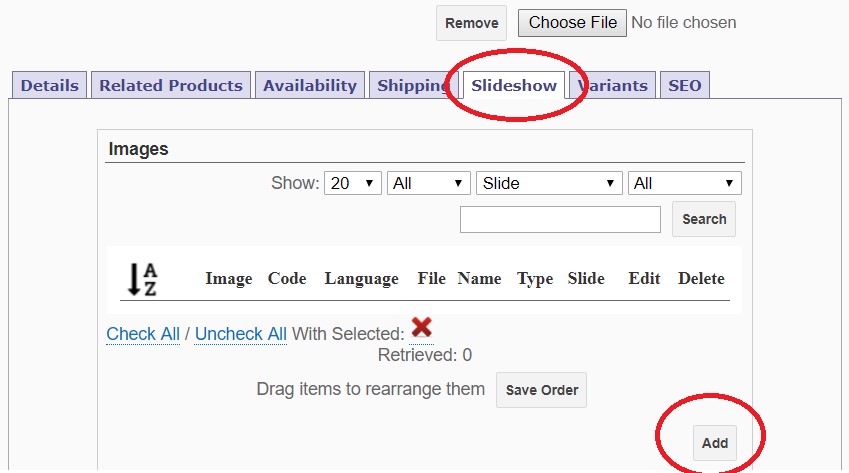
If we want to add more photos to a product:
- From the products Tab Click Slideshow
- Press the Add Button
- Press the Drop Files here to upload field
- We then select the photos from our computer
STEP 7.
If you want to add Categories:
- Go to E-Shop - Categories
- Click the Add Link in the Right menu
- We select the Main Category (Parent Category) If we want it to appear on the first level, we leave it top level.